
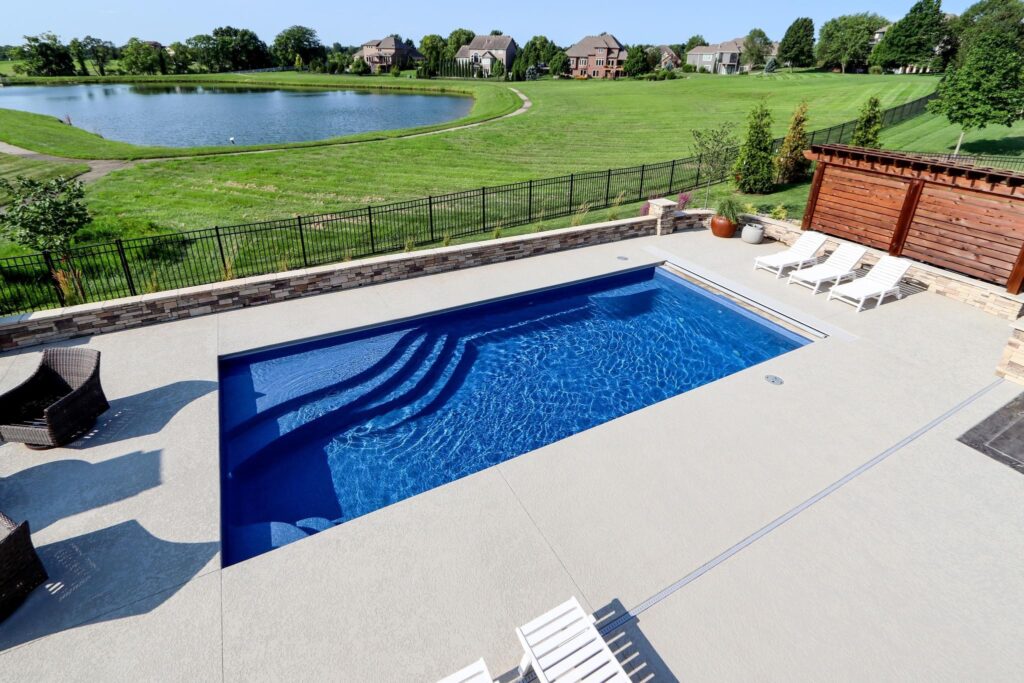
Professional Pool Tile Replacement for Durability, Safety, and Style
Pool tile serves multiple important purposes that go far beyond simple decoration. While it certainly adds beauty and style to your pool, its functional roles are equally critical to your pool’s health and longevity. Think of pool tile as both the “eyeliner” that defines your pool’s beauty and the “protective seal” that guards against damage.
Waterline Protection:
The area where water meets the pool wall is called the waterline. This zone faces constant challenges:
Chemical exposure: Chlorine, salt, and other chemicals concentrate here
Organic buildup: Body oils, sunscreen, lotions, and debris create a scum line
Mineral deposits: Calcium and other minerals can leave hard water stains
Water movement: Constant lapping and wave action causes wear
Tile provides a smooth, non-porous surface that resists these challenges much better than plaster or other materials.
Structural Protection:
Tile creates a protective barrier that:
Prevents water from seeping behind the pool surface
Protects the pool shell from chemical attack
Reduces erosion of underlying materials
Acts as a sacrificial layer that takes the brunt of wear
Visual Definition:
Creates a clean, finished transition between water and deck
Defines the pool’s shape and proportions
Adds color, texture, and design interest
Can make the pool appear larger or more dramatic
Safety Enhancement:
Provides visual cues about pool depth and edges
Can incorporate slip-resistant surfaces at critical points
Creates contrast that helps swimmers see pool boundaries
Some tiles glow in low light for nighttime safety
Tile problems often develop gradually, but catching them early prevents more serious damage. Here’s what to look for during your regular pool inspections:
Cracks and Breaks:
Hairline cracks: Small cracks that may grow over time
Spiderweb cracking: Multiple small cracks radiating from a point
Chipped edges: Especially concerning on coping or step edges
Complete fractures: Tiles broken into pieces
Loose and Missing Tiles:
Hollow sounds: When tapped, loose tiles sound different from solid ones
Movement: Tiles that shift when pressed
Gaps appearing: Between tiles or between tile and grout
Fallen tiles: Tiles that have completely come off
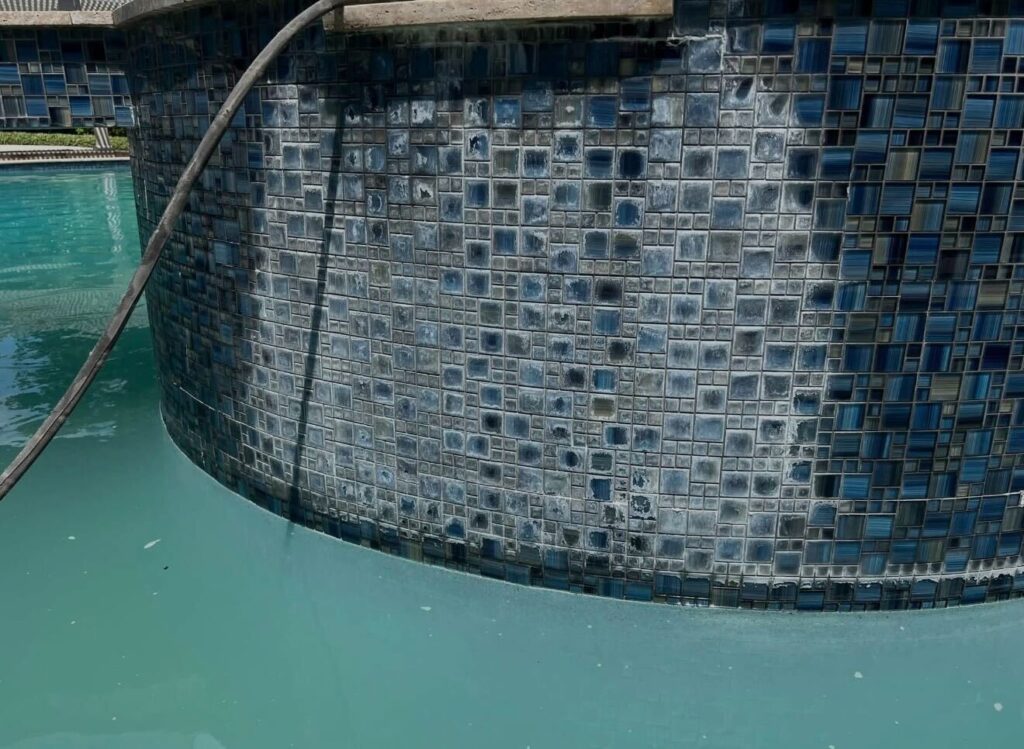
Discoloration and Staining:
Mineral deposits: White, gray, or rust-colored stains
Organic staining: Dark lines at the waterline
Chemical damage: Etching or bleaching of tile surfaces
Mold and mildew: Especially in shaded or poorly circulated areas
Grout Problems:
Crumbling grout: Grout that turns to powder when touched
Missing grout: Gaps where grout has fallen out
Discolored grout: Stains that won’t clean
Cracked grout lines: Especially if cracks align with tile cracks
Surface Irregularities:
Uneven tiles: Some tiles sitting higher or lower than neighbors
Sharp edges: Broken tiles creating cut hazards
Bubbling or bulging: Indicates water behind the tile
Efflorescence: White powder forming on tile surfaces
Water Loss Issues:
Unexplained water level drops
Constant need to add water
Wet spots behind pool walls (for interior tiles)
Increased chemical consumption (due to dilution)
Cleaning Problems:
Stains that won’t scrub off
Algae growth that keeps returning to the same spots
Rough surfaces that trap dirt
Areas that always look dirty despite cleaning
Safety Concerns:
Sharp edges that could cut swimmers
Slippery surfaces when algae grows in cracks
Loose tiles that could come off during use
Missing tiles exposing rough surfaces
Primary Functions and Importance:
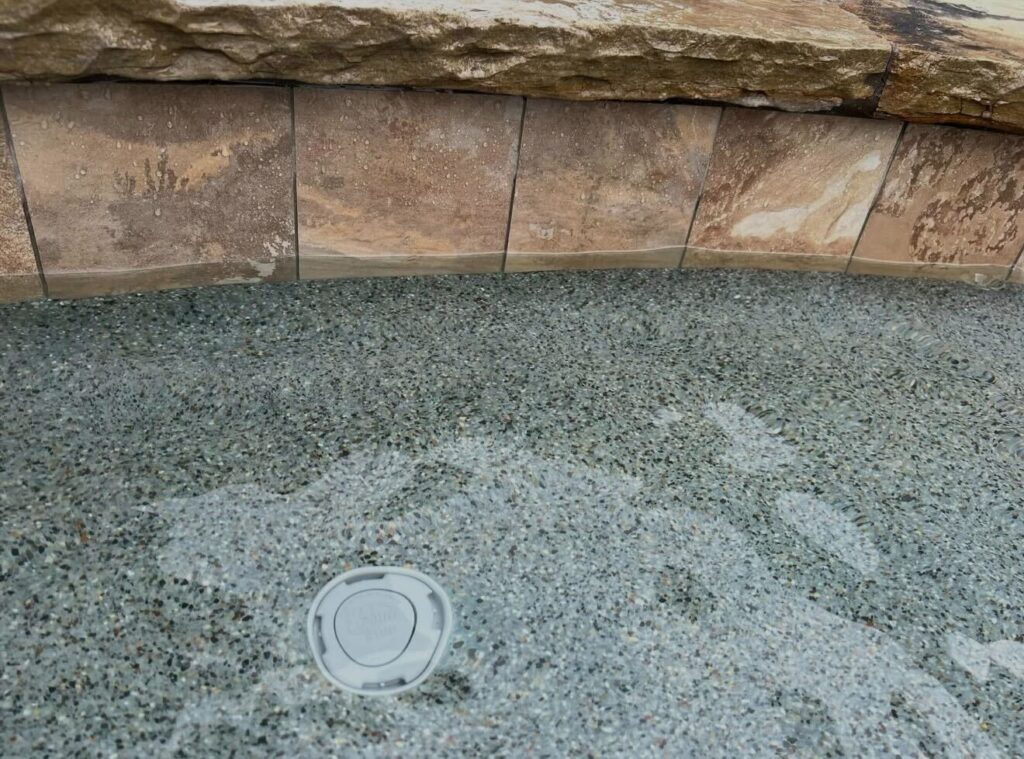
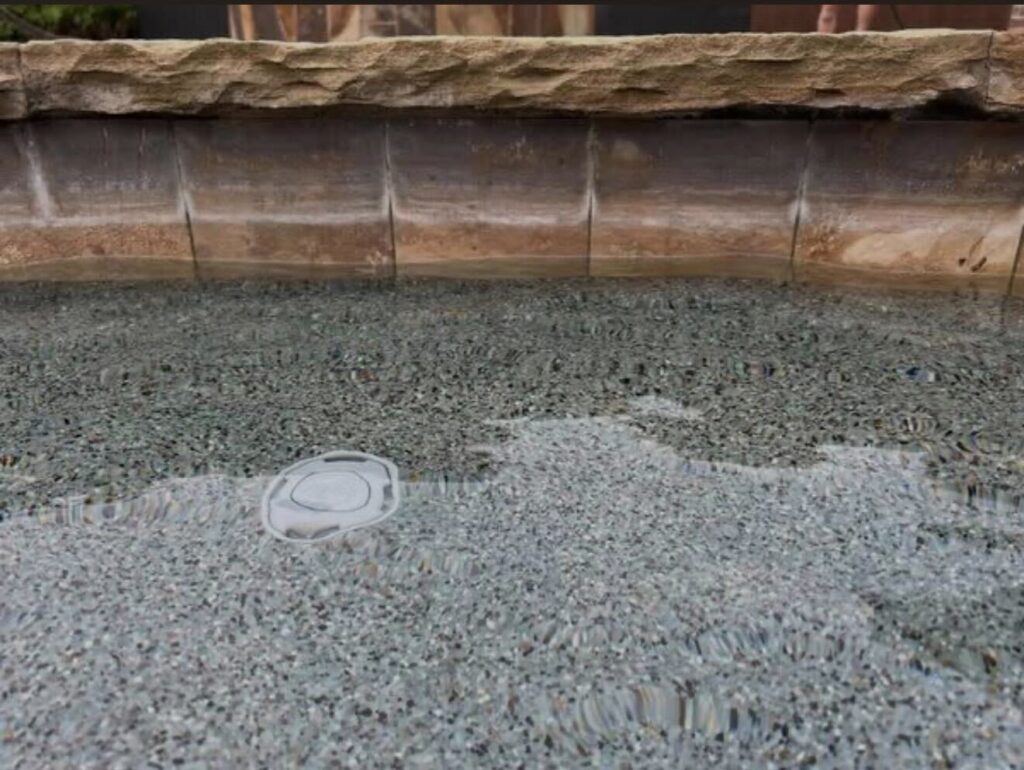
Waterline tile serves as the critical interface between your pool’s interior surface and the deck area. This band of tile, typically 6-12 inches wide, performs several vital functions that protect your pool investment. First and foremost, it creates a chemical-resistant barrier that shields the more vulnerable plaster or aggregate finish from concentrated chemicals that accumulate at the water surface. The waterline is where chlorine, sunscreen, body oils, and other contaminants concentrate, creating what pool professionals call the “scum line.” Without proper tile protection, this area would stain quickly and deteriorate the underlying surface.
The waterline tile also provides a smooth, easy-to-clean surface that can be wiped down regularly to maintain hygiene and appearance. Unlike porous plaster, tile doesn’t absorb oils or chemicals, making maintenance significantly easier. Additionally, waterline tile defines the pool’s visual edge, creating a crisp transition that makes the water appear more vibrant and the pool structure more defined. In terms of safety, it offers a clearly visible boundary that helps swimmers judge distances and depths, especially important for less experienced swimmers or in low-light conditions.
Common Problems and Failure Patterns:
Waterline tiles face constant challenges from their environment. Chemical damage is perhaps the most common issue, with improper pH balance causing etching or deterioration of tile surfaces and grout. Staining from minerals like calcium, iron, or copper presents ongoing challenges, often appearing as white, rust-colored, or greenish deposits that resist normal cleaning. In colder climates, freeze-thaw cycles can be particularly damaging, as water penetrates tiny cracks, freezes, expands, and causes tiles to crack or pop off. Structural movement of the pool shell, whether from ground settling or hydrostatic pressure changes, often manifests first at the waterline, causing cracking or separation. Ultraviolet exposure can fade colored tiles over time, especially on south-facing pool walls. Biological growth like algae or mold can become entrenched in grout lines or tile imperfections, creating recurring maintenance headaches.
Specialized Replacement Considerations:
Replacing waterline tile requires particular expertise and attention to detail. The curvature of the pool wall must be perfectly matched, which often means using smaller tile formats or specially cut tiles on curved sections. Precise water level control during installation is absolutely critical—the pool must be drained to just below the tile line and kept at that exact level throughout the installation and curing process. Temperature and humidity considerations become especially important, as rapid drying in hot weather or moisture issues in humid conditions can compromise adhesive curing. Expansion joint considerations are crucial, as tiles must be installed with proper spacing to accommodate thermal expansion and structural movement. Color and finish selection requires careful thought about how the tile will affect water appearance—darker tiles can make water look deeper, while lighter tiles can make it appear more vibrant. The transition to coping or deck materials must be carefully planned and executed to prevent water infiltration and ensure a clean aesthetic line.
Professional Insights and Recommendations:
For most residential pools, we recommend porcelain tile for waterline applications due to its excellent durability and low maintenance requirements. The installation should always include a waterproofing membrane behind the tile, especially in areas with high groundwater or poor drainage. Regular maintenance should include weekly brushing of the tile line and immediate attention to any stains or discoloration. During replacement, it’s often worthwhile to consider raising or lowering the waterline position if the original placement has proven problematic or if you’re changing pool usage patterns.
Design Functions and Applications:
Accent and feature tiles serve as the jewelry of your pool design, adding personality, visual interest, and custom character to what might otherwise be a utilitarian space. These tiles are typically used on stair treads, bench seats, swim-out areas, tanning ledges, and special architectural features like fountains, waterfalls, or raised walls. Their primary purpose is aesthetic—to create focal points, define different areas within the pool, and express personal style. Beyond beauty, they often serve functional purposes too, such as providing visual cues about depth changes on steps or creating slip-resistant surfaces on frequently used areas.
Feature tiles can range from simple contrasting borders to elaborate artistic expressions. They might incorporate different materials, textures, or finishes to create visual contrast with the main field tile. Some homeowners choose to use feature tiles to continue design themes from their home’s interior, creating a seamless indoor-outdoor living experience. Others use them to mark special occasions, incorporate family symbols, or express cultural heritage through traditional patterns.
Common Damage Patterns and Vulnerabilities:
Accent tiles face different challenges than waterline tiles, with physical wear being the primary concern. On steps and benches, constant foot traffic can wear down surfaces, especially on softer materials like some natural stones or lower-quality ceramics. Impact damage from pool toys, cleaning equipment, or accidental bumps is common on protruding features or corners. Grout deterioration often happens more quickly in high-traffic areas, as constant water movement and physical contact work grout loose over time. Staining can be particularly problematic if porous materials are used in areas where suntan lotion or body oils concentrate. In colder climates, freeze-thaw damage may be more severe on horizontal surfaces that trap water. Color fading from UV exposure affects some materials more than others, particularly certain natural stones and cheaper ceramics.
Replacement Challenges and Solutions:
Replacing accent and feature tiles presents unique challenges that require specialized expertise. Custom designs often mean that replacement tiles must be specially ordered, which can involve significant lead times and minimum order quantities. Pattern matching becomes crucial, especially with intricate designs or discontinued patterns. Material consistency can be difficult to achieve if the original tiles came from a specific quarry or production batch that’s no longer available. Integration with existing surfaces requires careful color and texture matching, as even slight variations can be noticeable in prominent locations. Structural considerations come into play when replacing tiles on features that may have shifted or settled since original installation. Waterproofing is especially critical behind feature tiles on raised walls or water features, where water pressure can be substantial.
Installation Best Practices:
When installing or replacing accent tiles, we recommend using materials with a slightly textured surface for slip resistance in high-traffic areas. The substrate preparation must be impeccable, with particular attention to proper slope for drainage on horizontal surfaces. Expansion joints should be incorporated around all sides of feature areas to prevent cracking from structural movement. For intricate designs, we often create template systems to ensure pattern consistency. Using epoxy-based grouts in feature areas provides better stain resistance and durability in high-wear locations. We always recommend ordering extra tiles (typically 10-15% more than needed) for future repairs, storing them in a protected location with documentation of their source and specifications.
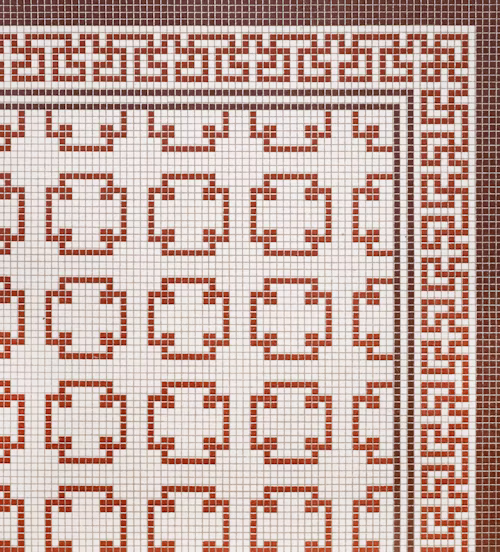

Artistic and Design Applications:
Mosaic tile work represents the highest form of artistic expression in pool design, transforming functional spaces into works of art. These installations use small tiles (typically less than 2 inches square) to create intricate patterns, pictures, or decorative borders. Mosaics can range from simple geometric patterns to elaborate scenes, corporate logos, or custom artwork. They’re often used as focal points on pool bottoms, backs of sun shelves, inside waterfalls, or as decorative bands at specific water depths.
The small size of mosaic tiles allows for incredible detail and curvature matching, making them ideal for complex shapes or detailed imagery. When combined with lighting effects, mosaics can create stunning visual impacts, with light playing across the multiple facets of the tiles. The reflectivity of glass mosaics, in particular, can make water sparkle in captivating ways. Beyond aesthetics, mosaics can serve practical purposes like depth markers or non-slip surfaces in specific areas.
Common Failure Modes and Maintenance Challenges:
Mosaic installations face several unique challenges. Individual tiles coming loose is perhaps the most common issue, as the many small pieces each represent a potential failure point. The numerous grout lines in mosaic work create extensive opportunities for water penetration and grout deterioration. Cleaning challenges are significant, as dirt and algae can become entrenched in the many crevices. Staining can be particularly noticeable on light-colored mosaics or those with intricate patterns. Structural movement affects mosaics more noticeably than larger tiles, as even slight shifting can create visible pattern distortions. Color consistency can be problematic if tiles from different production batches were used originally. Frost damage in cold climates can be devastating to mosaic installations, as water penetration and freezing can dislodge multiple tiles simultaneously.
Replacement Complexities and Specialized Approaches:
Replacing mosaic tile requires artistic skill as well as technical expertise. Pattern matching is extremely challenging, especially with custom designs or discontinued tile lines. Color matching small tiles from different production runs is often impossible, making partial repairs visually obvious. The time-intensive nature of mosaic work means that replacement costs can be high relative to the area covered. Specialized tools are needed for working with small tiles, including precise cutting equipment and magnification for detailed work. Substrate preparation must be flawless, as any imperfections will telegraph through the small tiles. Grout selection and application require particular care, as the many joints must be completely filled without staining the tiles. When original tiles aren’t available, sometimes the best approach is to create a completely new mosaic that complements rather than matches the original, treating the repair as a design opportunity rather than a limitation.
Professional Recommendations for Mosaic Longevity:
For clients considering mosaic installations or repairs, we recommend using glass tiles for their durability and colorfastness. The substrate should include a crack isolation membrane to prevent structural movement from damaging the mosaic. Epoxy grout is essential for mosaics, as it provides better waterproofing and stain resistance than cement-based grouts. Regular maintenance should include gentle brushing with a soft brush—never metal or stiff bristles that could damage grout or dislodge tiles. Professional cleaning annually can help maintain the appearance and identify potential problems early. When installing new mosaics, we always photograph the pattern and document tile sources comprehensively for future reference.
Functional Importance and Design Role:
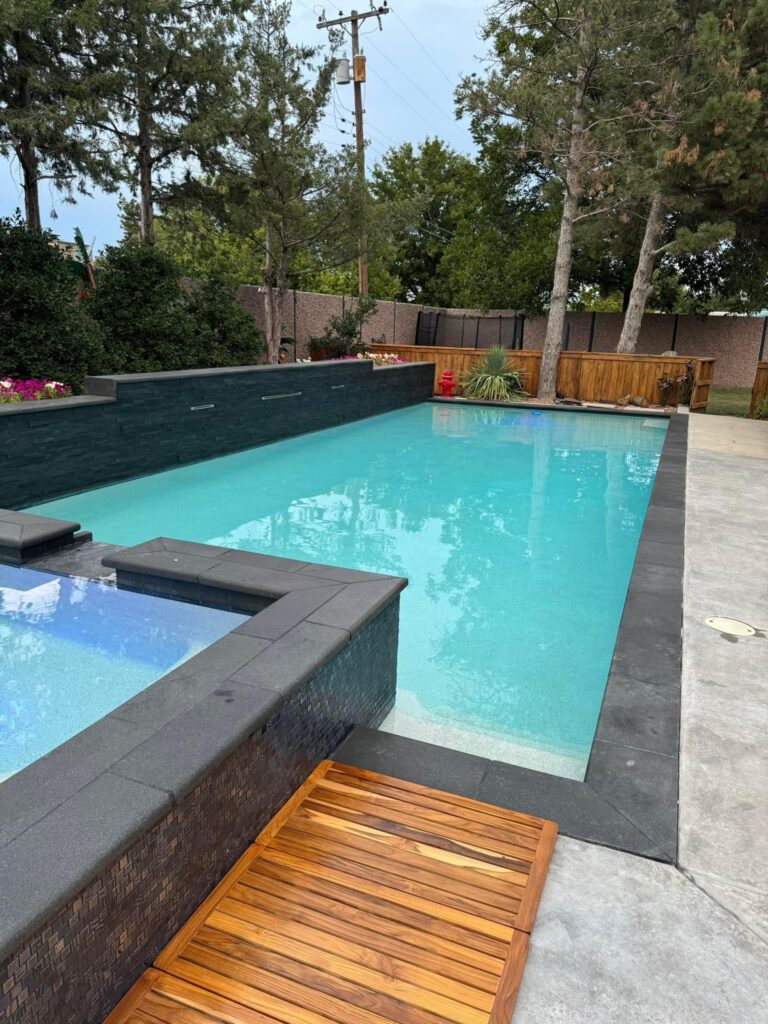
Coping tile serves as the crucial transition between the pool structure and the surrounding deck, performing both functional and aesthetic roles. Functionally, coping protects the pool’s edge from water damage, provides a safe, comfortable edge for swimmers to grip, and often incorporates drainage systems to direct water away from the pool. Aesthetically, it defines the pool’s shape, creates a finished appearance, and can dramatically influence the overall style of the pool area. Coping materials and designs vary widely, from simple bullnose tile to elaborate natural stone patterns.
The coping is one of the most interacted-with elements of a pool—people sit on it, walk along it, push off from it, and use it for entering and exiting the water. As such, it must be durable, comfortable, and safe. Properly designed coping also helps prevent deck drainage from entering the pool, a critical function for maintaining water chemistry and reducing maintenance. In terms of safety, coping should be slip-resistant and free of sharp edges, with proper radius on corners to prevent injuries.
Typical Damage and Wear Patterns:
Coping tile faces constant mechanical stress and environmental challenges. Cracking from structural movement is common as pools and decks expand and contract at different rates or settle unevenly. Surface wear from sitting and walking can polish down textures or wear through glazes on ceramic tiles. Freeze-thaw damage in cold climates can be severe, especially if water penetrates and freezes beneath the coping. Staining from leaves, berries, or metal furniture can be difficult to remove, particularly from porous materials. Grout deterioration accelerates in coping applications due to constant water exposure and physical stress. Color fading from UV exposure affects some materials more than others, with natural stones often changing color over time. In saltwater pools, corrosion of metal edges or reinforcement beneath coping tiles can cause lifting or cracking.
Replacement Considerations and Integration Challenges:
Replacing coping tile often involves more than just the tiles themselves. The underlying structure frequently needs attention, as waterproofing membranes may have failed or drainage systems may be compromised. Deck integration becomes a major consideration, as the new coping must align perfectly with existing deck elevations and drainage slopes. Material matching is challenging, especially with natural stone where color and grain patterns vary between batches. Structural assessments are crucial before coping replacement, as underlying issues must be addressed to prevent rapid failure of the new installation. Drainage system evaluation and potential upgrading should be part of any coping replacement project. Safety upgrades present an opportunity during coping replacement—adding slip-resistant textures, improving edge visibility with contrasting colors, or incorporating better handhold profiles.
Installation Best Practices and Material Recommendations:
For coping applications, we strongly recommend porcelain or natural stone tiles for their durability and wear resistance. The installation should always include a proper slope away from the pool (typically ¼ inch per foot) to ensure proper drainage. Expansion joints must be incorporated at regular intervals and at all changes in direction. Under-tile waterproofing is essential, even in dry climates, to prevent water migration that could damage the pool structure. For comfort and safety, we recommend rounded edge profiles rather than sharp corners. In colder climates, freeze-thaw considerations may dictate specific material choices and installation methods. Regular maintenance should include checking for loose tiles, deteriorated grout, and proper drainage function. During replacement, we often take the opportunity to upgrade drainage systems or add lighting for improved safety and ambiance.
Ceramic Tile:
Pros: Affordable, wide variety, easy to cut and install
Cons: Less durable, can crack more easily, porous if not glazed
Lifespan: 5-10 years typically
Best for: Budget projects, indoor pools, above-water applications
Porcelain Tile:
Pros: Very dense and durable, low water absorption, frost-resistant
Cons: Harder to cut, more expensive
Lifespan: 10-20+ years
Best for: High-use pools, areas with freeze-thaw cycles
Glass Tile:
Pros: Stunning appearance, non-porous, resistant to chemicals
Cons: Expensive, requires special installation, can be slippery
Lifespan: 15-25+ years
Best for: Luxury pools, accent features, contemporary designs
Natural Stone Tile:
Pros: Unique natural beauty, can be very durable
Cons: Requires sealing, can be porous, may stain
Lifespan: Varies by stone type (5-20 years)
Best for: Natural-looking pools, specific design aesthetics
Initial Inspection:
We examine every tile, tapping to check for hollow sounds
We document all damage with photos and notes
We assess the underlying surface condition
We check for structural issues that might affect tile
We evaluate water chemistry history that might have caused damage
Measurement and Documentation:
Precise measurements of the tile area
Documentation of existing tile patterns and layouts
Color matching for replacement tiles
Assessment of tile availability (some older tiles may be discontinued)
Underlying Issue Identification:
Checking for plaster damage behind tiles
Assessing coping and deck conditions
Identifying water intrusion problems
Evaluating structural movement that caused tile failure
Pool Draining:
Proper water disposal according to local regulations
Gradual draining to prevent shell damage
Protection of pool surface during empty period
Timing considerations (avoiding sun exposure on empty pool)
Site Protection:
Covering pool bottom to protect from falling debris
Protecting deck and landscaping around work area
Setting up safe work zones and access paths
Securing the area for safety (especially important with empty pool)
Material Preparation:
Tile selection and acquisition
Grout and adhesive selection (pool-specific materials)
Tool and equipment preparation
Custom cutting of tiles if needed
Careful Demolition:
Starting with loose and damaged tiles first
Using proper tools to avoid damaging surrounding tiles
Working systematically around the pool
Preserving sample tiles for matching if needed
Surface Cleaning:
Removing all old adhesive and grout
Cleaning the substrate thoroughly
Repairing any damage to the underlying surface
Ensuring a smooth, clean bonding surface
Substrate Preparation:
Checking substrate integrity
Making necessary repairs to plaster or gunite
Applying waterproofing if needed
Creating proper surface profile for adhesion
Layout and Planning:
Dry layout to check fit and pattern
Establishing reference lines for alignment
Planning cuts and special pieces
Ensuring pattern continuity around corners and features
Adhesive Application:
Using pool-grade waterproof adhesives
Proper trowel technique for complete coverage
Working in manageable sections
Accounting for temperature and humidity conditions
Tile Setting:
Precise placement according to layout lines
Consistent spacing using spacers
Ensuring proper alignment and level
Special attention to corners and transitions
Cutting and Fitting:
Precise cutting for borders and obstacles
Smooth edge finishing
Custom pieces for special features
Quality check of all cuts and fits
Grout Selection and Preparation:
Choosing pool-specific, mold-resistant grout
Selecting color that complements tile
Proper mixing for consistency
Testing on sample tiles if needed
Grout Application:
Working in sections to manage working time
Complete filling of all joints
Proper tooling for smooth finish
Immediate cleanup of excess grout
Cleaning and Sealing:
Thorough cleaning of tile surfaces
Removal of all grout haze
Application of sealers if required (for natural stone or porous tiles)
Final inspection for cleanliness
Proper Curing:
Allowing adequate cure time before water exposure
Protecting from rain or moisture during cure
Following manufacturer’s cure recommendations
Temperature monitoring during cure period
Pool Refilling:
Gradual filling to prevent thermal shock
Water treatment during filling
Monitoring for any issues during fill
Final water level adjustment
Startup and Balancing:
Proper chemical startup for fresh water
Special considerations for new tile and grout
Water testing and balancing
Initial maintenance instructions
When Partial Replacement Works:
Isolated damage in small areas
Available matching tiles
Structurally sound surrounding tiles
No underlying substrate issues
When Complete Replacement is Better:
Widespread tile failure
Discontinued tile patterns
Underlying surface problems
Desire for design update
Cost-effectiveness of complete job vs. multiple partial repairs
Challenges with Older Pools:
Discontinued tile patterns
Custom artwork that can’t be replicated
Historic preservation requirements
Matching aged colors and finishes
Our Approach:
Searching specialty suppliers for matches
Custom fabrication if needed
Careful removal for preservation of undamaged tiles
Documentation for future reference
Coordinating with Resurfacing:
Ideal time for tile replacement
No additional draining needed
Seamless integration with new surface
Cost savings through combined labor
During Deck Replacement:
Opportunity to address coping issues
Proper integration with new deck elevation
Updated transition between deck and pool
Improved drainage considerations
With Equipment Upgrades:
Opportunity to address waterline changes
Integration with new automation systems
Updated look to match modern equipment
Durability Requirements:
High-use residential pools: Porcelain or high-quality ceramic
Saltwater pools: Glass or porcelain (better chemical resistance)
Cold climates: Frost-resistant porcelain
Commercial pools: Commercial-grade porcelain or quarry tile
Aesthetic Preferences:
Modern look: Glass tile, large-format porcelain
Traditional look: Ceramic with classic patterns
Natural look: Stone tile, tumbled stone looks
Color preferences: Consider how tile color affects water appearance
Budget Considerations:
Economical: Basic ceramic tile
Mid-range: Quality porcelain or standard glass
High-end: Custom glass, premium natural stone
Remember: Installation costs are similar regardless of tile cost
Maintenance Requirements:
Low maintenance: Porcelain, glass
Medium maintenance: Glazed ceramic
High maintenance: Natural stone (requires sealing)
Consider: Tile size affects grout lines and cleaning difficulty
Tile Size and Format:
Small tiles: More grout lines, potentially more maintenance
Large tiles: Fewer grout lines, but more challenging on curved surfaces
Mosaics: Beautiful but installation-intensive
Standard sizes: Typically 6×6, 4×4, or 3×6 inches for waterline
Surface Texture:
Glossy: Reflects light, shows water movement
Matte: Hides imperfections, more natural look
Textured: Better slip resistance, hides mineral deposits
Consider: How texture affects cleaning and appearance over time
Color Selection:
Light colors: Show less scale, make pool look larger
Dark colors: Create dramatic contrast, show water sparkle
Blue tones: Enhance water color
Neutral tones: Timeless, work with any design
Consider: How tile color interacts with deck and house colors
Project Scope:
Linear feet of tile being replaced
Number of corners and complexities
Height of tile band (single row vs. multiple rows)
Special features (steps, benches, etc.)
Tile Material Costs:
Ceramic: $2-$8 per square foot
Porcelain: $5-$15 per square foot
Glass: $10-$30+ per square foot
Natural stone: $10-$25+ per square foot
Labor Considerations:
Condition of existing surface
Complexity of pattern or design
Accessibility of work area
Need for custom cutting or fitting
Additional Costs:
Pool draining and refilling
Disposal of old materials
Necessary surface repairs
Water treatment after refill
Permits if required
Small Repair Projects ($500 – $2,000):
Replacement of individual tiles
Small sections of damaged tile
Minor regrouting projects
Partial Replacement ($2,000 – $5,000):
One side of pool or specific areas
Waterline tile on portion of pool
Feature tile replacement
Complete Waterline Replacement ($5,000 – $15,000+):
Entire pool perimeter
Full design update
Premium materials
Complex patterns or mosaics
Get multiple quotes from qualified professionals
Ensure quotes include all aspects of the project
Compare materials being proposed
Check references and previous work
Understand warranty coverage
Our team has hands-on experience working specifically with pool tile systems, including waterline, decorative, and accent tile. We understand how tile interacts with plaster, coping, and pool structure, ensuring replacements are done correctly and last.
Proper alignment, spacing, and bonding are critical for both appearance and durability. We focus on precise installation to ensure clean lines, secure adhesion, and a professional finish.
Tile replacement can be messy if not handled carefully. We protect surrounding surfaces, keep work areas organized, and clean up thoroughly to maintain a professional experience from start to finish.
Our tile replacements are not just cosmetic. Each installation is completed with durability, water protection, and long-term performance in mind to help protect your pool structure and reduce future repairs.
Typical Timeline:
Assessment and planning: 1-2 days
Material acquisition: 1-2 weeks (depending on tile availability)
Preparation and draining: 1 day
Tile removal and surface prep: 1-2 days
Tile installation: 2-5 days (depending on complexity)
Grouting and finishing: 1-2 days
Curing time: 1-3 days (before refilling)
Refilling and startup: 1-2 days
Total typical project: 1-3 weeks from start to completion
Factors affecting timeline:
Weather conditions
Tile availability
Complexity of design
Need for custom fabrication
Coordination with other work
Matching possibilities:
Exact matches: Possible if tile is still available
Close matches: Similar color and style
Design integration: Complementary tiles that work with existing
Complete change: Sometimes better to update entire look
Our approach:
We search multiple suppliers for matches
We provide samples for your approval
We can blend old and new in creative ways
We’re honest about matching possibilities
Limited possibilities:
Above-water repairs: Minor coping or deck tile
Temporary barriers: For small sections at waterline
Underwater adhesives: For emergency repairs only
Reality for most projects:
Waterline tile requires draining
Proper installation needs dry conditions
Draining allows inspection of underlying surfaces
Most professional work requires pool to be empty
Initial Care (First 30 Days):
Follow specific startup procedures
Regular gentle cleaning
Avoid harsh chemicals initially
Monitor water chemistry closely
Ongoing Maintenance:
Weekly brushing of tile line
Regular water testing and balancing
Prompt stain removal
Annual professional inspection
Re-sealing if using natural stone
Prevention Tips:
Maintain proper water chemistry
Regular brushing prevents buildup
Use pool covers to reduce debris
Address stains promptly
Professional cleaning annually
Common Causes:
Poor installation: Inadequate surface prep or adhesive
Water chemistry issues: Improper pH or chemical balance
Structural movement: Settling or shifting of pool
Freeze-thaw cycles: In cold climates without proper materials
Physical damage: Impact or wear
Age: Natural deterioration over time
Prevention Strategies:
Regular professional inspections
Maintain proper water chemistry
Address structural issues promptly
Use pool covers in winter
Avoid harsh cleaning methods
Choose quality materials initially
Our General Recommendations:
For most residential pools, we recommend porcelain tile for waterline applications due to its excellent balance of durability, maintenance, and cost. Glass makes spectacular accents but requires careful placement and maintenance understanding. Natural stone works beautifully in specific applications with proper maintenance commitment. Ceramic serves budget projects or protected applications well.
Installation Considerations:
Regardless of material choice, professional installation is crucial. Each material requires specific preparation, adhesives, grouts, and techniques. Expansion joint placement, waterproofing details, and drainage considerations must be addressed appropriately for the materials chosen.
Long-term Planning:
Consider not just initial installation but long-term maintenance and potential repairs. Document all material selections, including manufacturer, color, size, and finish details. Purchase and store extra tiles for future repairs. Establish a maintenance routine appropriate for your materials.
Integration with Overall Design:
Tile selection should complement other pool elements—plaster color, deck materials, coping style, and surrounding landscape. Consider how different materials work together and create a cohesive design rather than focusing on tiles in isolation.
By understanding the characteristics, advantages, and limitations of each tile type, you can make informed decisions that balance aesthetics, performance, maintenance, and budget. The right tile choice, properly installed and maintained, will enhance your pool’s beauty and functionality for many years.
We provide professional pool Tile Replacement services across North Texas, including Frisco, Plano, McKinney, Allen, and surrounding communities.